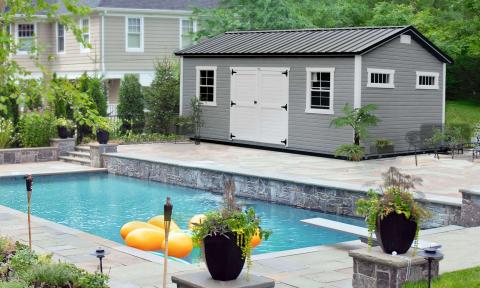
The reality is that summer is quickly approaching. This means you are not alone in considering your options when it comes to lounging poolside in the sun over break! Let us walk you through what designing and building your own standard 10x12 modern shed would look like, compared to allowing us to handle the process for you.
Whether you are in the stage of perusing shed design plans, or wondering whether tackling your own shed project is something you can do, discover what the process of shed design entails with our useful materials list and breakdown.
Which Materials Do I Need to Design My Pool Shed?
Similar to any other home or do-it-yourself project, before setting out to build your portable structure you should brainstorm what the end-product will look like. Don’t forget to factor in the size and style that makes sense for you and your family’s preferences.
You will also have to scout the perfect location, with flat, even foundations being preferable to those which will require added grunt work to level. You should also plan to obtain a building permit prior to commencing your project.
Materials Listing: From Site Preparation to the Finishing Touches
Curious as to how purchasing your next storage or outdoor pool shed from us compares to building one yourself? Browse through the basic materials listing below to get an idea of how much product you would need to invest in for a typical 10x12 storage unit. Depending upon your needs, you may require more or less of the following.
Prep, Framing and Roofing
Long story short, you will need two foundational ingredients to get your pool shed started: concrete and bricks. Framing will be needed for structuring your floor, walls, roof, with pressure-treated lumber being your best option as a material. Plywood will also be required for your roof sheathing, along with wood screws and a flat-head Phillips screwdriver.
Doors, Siding and Hardware
For doors and siding, you will require a supply of pressure-treated lumber, wood boards, and plywood. Hardware will necessitate additional items such as hinges, pulls, surface bolts, galvanized nails and wood screws.
Foundation Prep
What is most important in preparing and laying your pool shed’s foundation is that you achieve a flat, even surface to lay bricks and concrete. After digging one-foot trenches at least one foot in depth and width, these should be filled with concrete and allowed to dry. Every concrete mix is different, so you should consult the directions on whichever brand you select. Standard bricks can then be used to line the trenches and guide the construction of the rest of the foundation.
Decorations
Once your structure is complete, you should take the time to customize the paint, preservative color or staining to suit your personal preferences. This may also include but is not limited to upgraded fasteners and door hinges, designer roofing options, adding windows or skylights, and more!
Does This Sound Like Too Much Work? Let Us Handle the Project
Although we are always happy to see our customers tackle projects on their own, you should also know that we are here for you if you need assistance. In fact, we’d be thrilled to handle the whole pool shed job for you! Get in touch with us today to receive a customized quote for free.